Step 4 - Add your item list: Folders and items

Übersicht
All items that you are selling, you also create as items on your orderbird MINI. To keep an overview, you sort your items into folders. That way you can find everything much faster.
All that typing is not for you?
We will be happy to offer you our item list import service through our support team. If you'd like to use this service, we'll email you a template to fill out on your computer. Send it back to us, and we'll upload your folders and items to your POS system within a few business days.
Please note that a one-time fee may apply for this service. If you’re interested, feel free to contact us. Question, problem or feedback? Chat with us!
Let's go!
Thematically very appropriate: If you work with DATEV account assignments, take a look here: 1. Setting up DATEV - Let's get started
1. Folder
Adding a folder
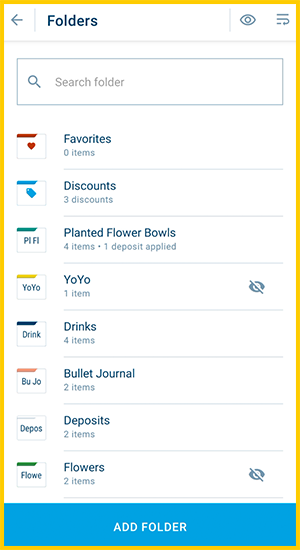
- Open [Main Menu] > [item list] > [Folders].
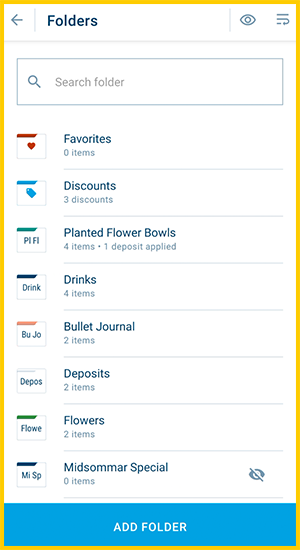
- Tap on [ADD FOLDER] at the bottom.
- Choose...
- the name of the new folder,
- the DATEV account numbers for regular and, if required, reduced VAT, and
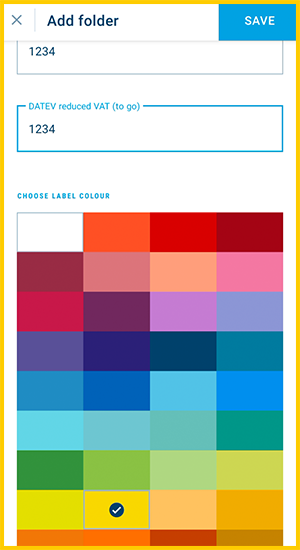
- the color of the folder. This will help to find it quickly on the sales screen - and it looks nice.
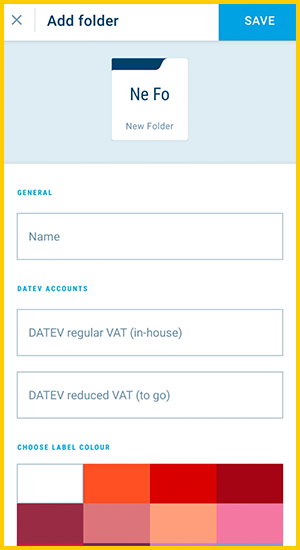
- Tap on [Save] at the top right.
- Done!
Hide folders
If you work with seasonal items or all items of a folder are completely sold out, you can hide a folder. This way the folder is not deleted and with only one tap you can make it visible again.
- Go to [Main Menu] > [item list] > [Folders].
- Tap on the [Eye icon] in the top row.
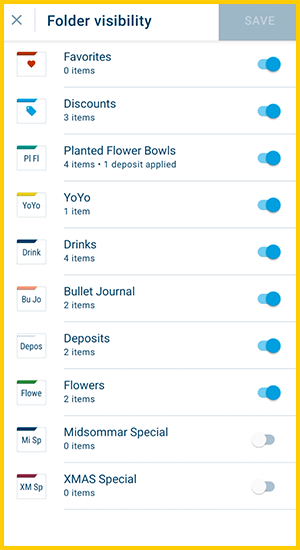
- Select the folder(s) to be hidden by tapping on the blue button. In this example, the folders are "YoYo" and "Flowers".

- Tap on [Save].
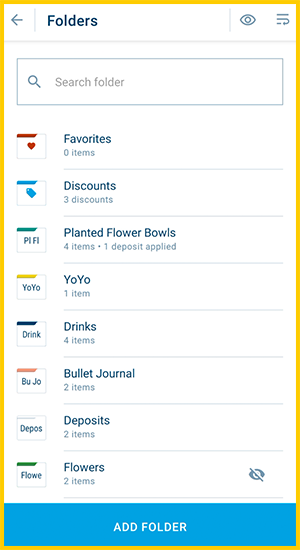
- Now you will see a crossed out eye symbol next to the hidden folder.
- Done.
Make folders visible again
To make a folder visible again, proceed in the same way:
- Go to [Main Menu] > [item list] > [Folders].
- Tap on the [Eyes icon] in the top row.

- Select the folder(s) to be shown by tapping on the white button. In this example, it is the folder "YoYo".
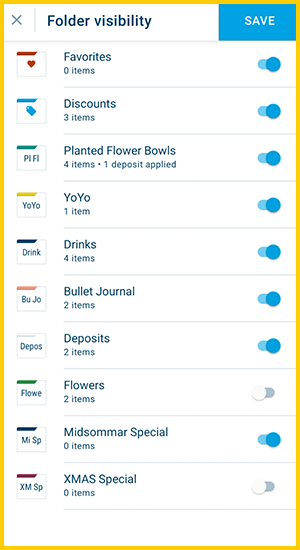
- Tap on [Save].
- Now the folder is visible again!
2. Items
Adding an item
You can enter the following information for an item:
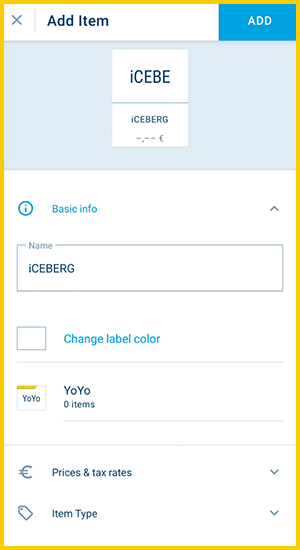
General information
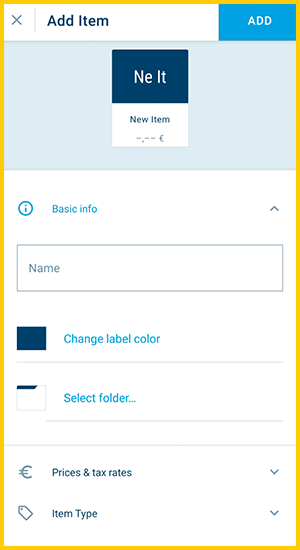
Enter this information about your item:
- Enter a name
- Pick a color
- Select the folder in which the item is located
Then it looks like this:
Prices and tax rates
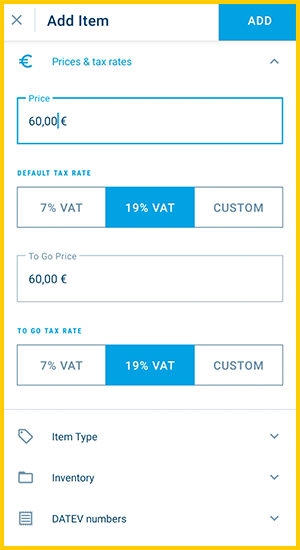
- Enter a price
- Set the default tax rate
If you have activated the switch between In-House and Take Away, you can specify the price and tax rate for To-Go orders here. By default, the following applies here:
- Take Away price will be taken from the default price you entered above. Adjust it if necessary.
- Take Away tax rate: Set the default value in Settings > VAT. Adjust it if necessary.
Sales mode
You can disable a sales mode or set it as default: Customize or hide "In-House" & "Take Away" ordering methods.
If you have several items in the same category that share the same price and tax rate then you can have them inherit this data from the category, meaning that you only have to fill it in once, but it will be applied to all products in this category.
Item Type
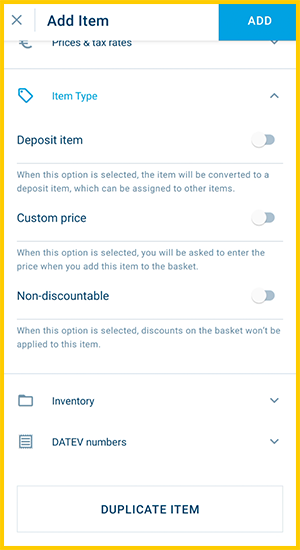
- Deposit item: Activate this option to mark an item as a deposit ("Non-discountable" will be activated as well). You can then assign the deposit item to other items and folders to add it automatically. Read more here: Add a deposit and charge it during sale
-
Custom price: Activate this option to be able to enter a custom price for the item. You can use this option e.g. for goods that you charge by weight or size.
Items with free price
You can also quickly create items with free price via the € screen when the day is open. Read more here: Items with a free price: sell, create on-the-go and select existing ones
- Non-discountable: If you activate this option, discounts will have no effect on the price of this item. This is useful for deposits that are not allowed to be discounted.
Item list
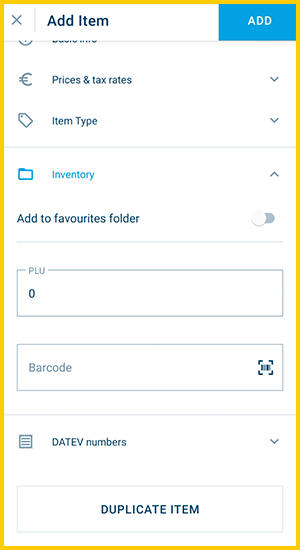
- Add the item to your favorites folder to find it more quickly when you are selling it: Working with favorites
- Enter a PLU if you are working with PLUs. Please note that PLUs must be unique for each item!
- Enter or scan a barcode to be able to book in your items with the MINI's camera or integrated scanner, depending on your MINI Version.
DATEV numbers
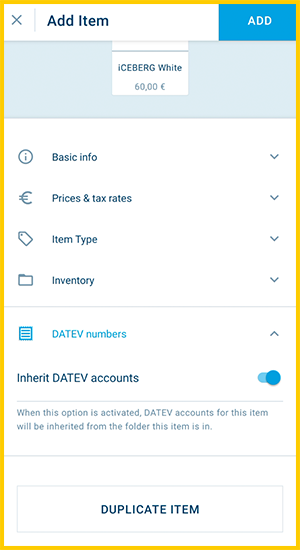
By default, the DATEV accounts are taken from the folder in which your item is located. If necessary, you can also enter unique DATEV accounts for your items, e.g. if they are different from those of the folders. Please discuss this with your tax advisor first, though. We also have an additional link for them to help you with the setup: How is the DATEV export of orderbird structured? (Info for tax advisors)
Deactivate the option "Inherit DATEV account settings" and enter the correct regular and reduced DATEV account numbers. Your tax advisor will tell you which accounts are the right ones for you. You can find all information about setting up DATEV here: 1. Setting up DATEV - Let's get started
Edit items
You can of course edit your items at any time. Just search for the item via [menu] > [item list] > [all products]. Then tap on it to start editing the item.
Make sure that you create new items and do not "convert" existing ones, e.g. rename the item "fountain pen" to "eraser". This way, the (hidden) unique identification number remains the same for the item. That's the reason why it would not only appear in your statistics from the change date but also retroactively under the changed name. This means that you no longer have a clean evaluation.
Example: You sell the item "fountain pen" 3 times on Monday. On Tuesday, you change the item to "eraser" and sell it 5 times. In your weekly report, the eraser now appears 8 times!
All done? Then don't forget to save ;-).
3. Summary
At any time, you can:
- Create new folders and items
- Mark your bestsellers as favorites to sell them even faster
- Delete old items and folders
- Hide seasonal items
Everything to maintain the overview easily and that it looks the way you like it best!
And because it's so nice to read some things twice, here's another reminder of what's so thematically appropriate: 1. Setting up DATEV - Let's get started
And now that you have all of your goodies in the machine: go ahead and try out how your orderbird MINI works... (aka step 5).