DATEV setup Step 1: MY orderbird
Learn how to get started with DATEV and set up the necessary details for successful usage.

Übersicht
Would you like to use the DATEV export to make your accounting easier? Great — here you will find our guide explaining where and how to store the DATEV accounts for your orderbird MINI.
Bring your tax advisor on board
Coordinate with your tax advisor and/or accounting department to determine which account numbers are correct for your business. Your tax office will be happy to provide you with a list of the required account numbers.
It is also helpful for them to understand how the DATEV export is structured. You can find this information here: How is the DATEV export from orderbird structured? (Information for tax advisors)
Important information
-
All changes you make to the DATEV settings take effect immediately.
For clean and accurate revenue reporting, it may be advisable to make changes only after the business day has ended or at the end of the month. We recommend coordinating this with your tax advisor. -
Changes are not applied retroactively.
DATEV exports that were created before the account changes remain unchanged. The new settings only apply to data generated from the time of the change onward. - If you leave accounts empty, default accounts from SKR 03 will be assigned automatically. You can find out which ones here: Default DATEV account numbers (default settings)
- If you do not store any accounts, no DATEV export will be generated.
DATEV step by step
To help you enter all relevant information quickly and easily, we provide a step-by-step guide. Click here to get started with DATEV…
-
DATEV setup in MY orderbird
- Enter DATEV details
- Store DATEV accounts for payment methods
- DATEV setup step 2: Product list in orderbird MINI
Changes to DATEV account numbers take effect immediately
Attention: Changes to DATEV account numbers take effect immediately. Please coordinate with your tax advisor to determine whether it is better to apply changes at the turn of the month.
a. Enter DATEV details
- Log in to MY orderbird and navigate to Settings > DATEV Details .
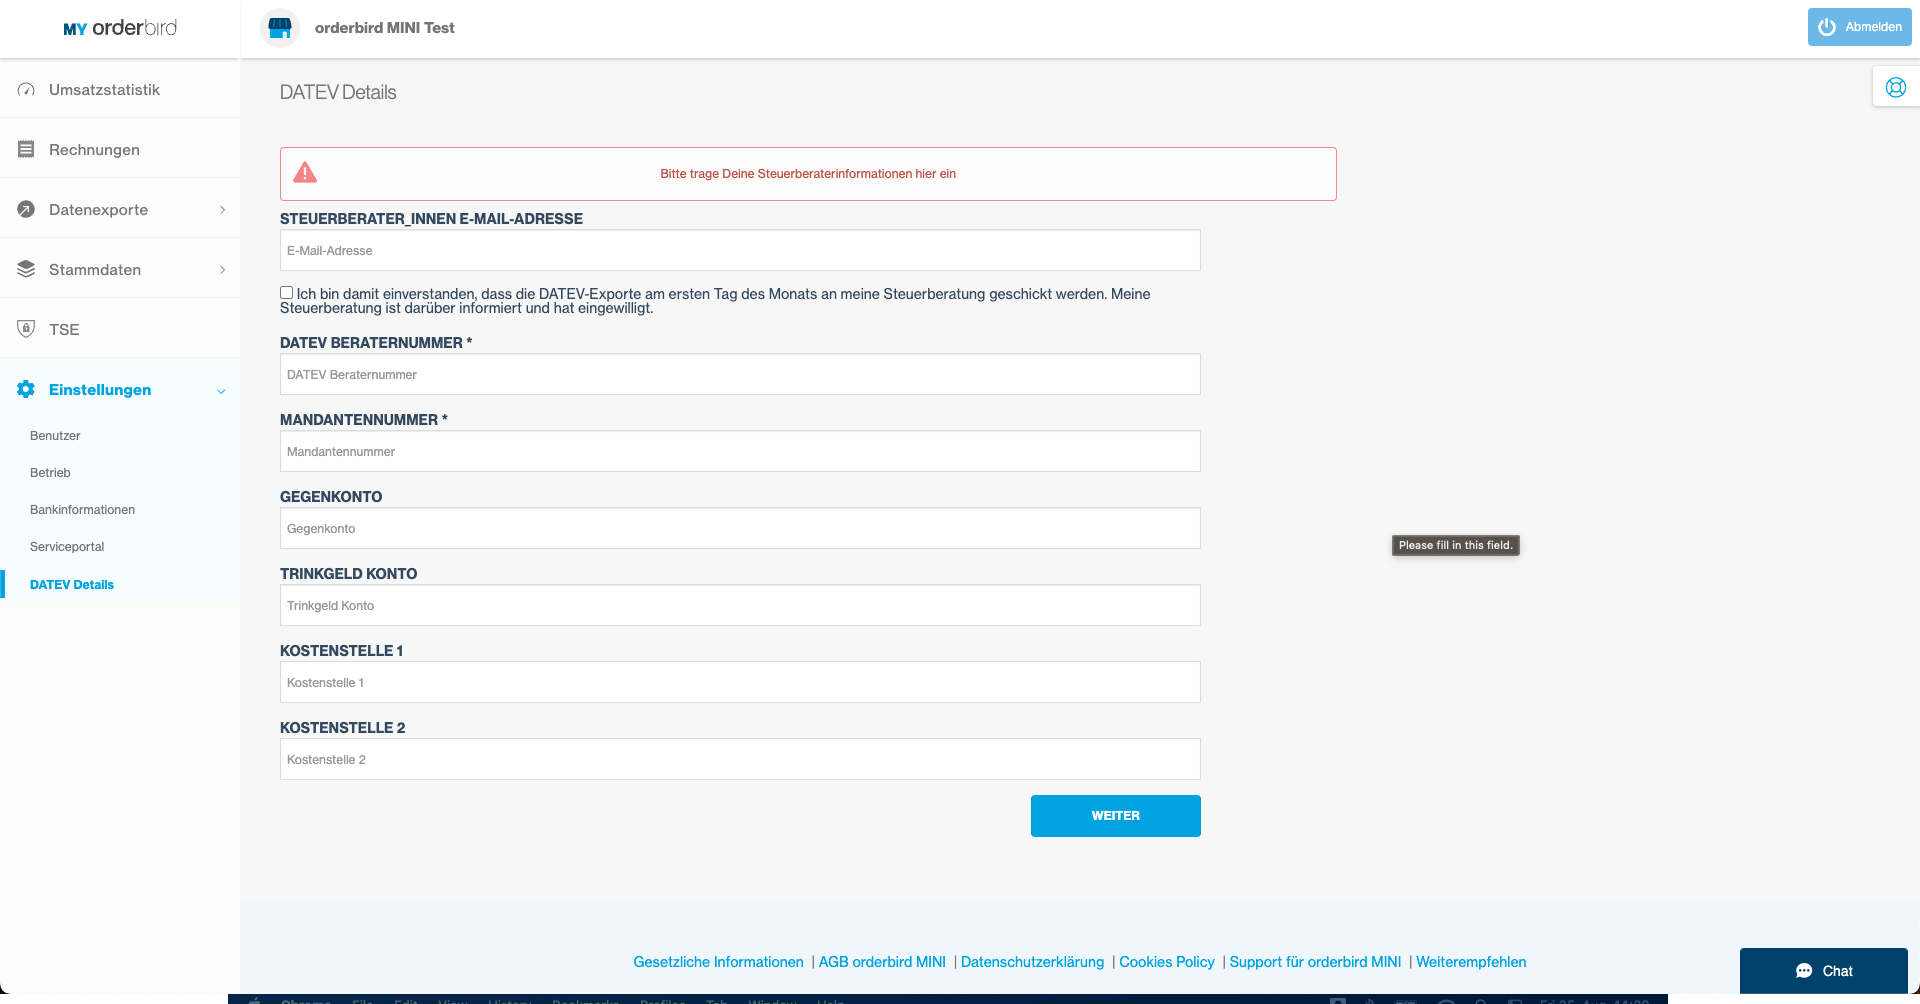
- To ensure your DATEV export can always be clearly identified, we recommend completing the following fields:
- TAX ADVISOR EMAIL ADDRESS: Email address of your tax advisor.
- DATEV ADVISOR NUMBER: ID of your tax advisor, which is passed on with the DATEV export. This ensures the export reaches the correct contact person, even in larger firms.
- CLIENT NUMBER: Your client number with your tax advisor, which is also included in the DATEV export. This makes it immediately clear which client the export belongs to.
- OFFSET ACCOUNT: Required so that revenues can be correctly allocated in DATEV.
- TIP ACCOUNT: This allows tips entered via your orderbird MINI to be evaluated separately and treated differently for tax purposes than your regular revenue.
- COST CENTER 1: Optional. No DATEV account needs to be entered here. Instead, you or your tax advisor can enter an ID of your choice for your branches — very useful if you operate multiple orderbird POS systems. This allows you to use the same account numbers for all branches while your tax advisor or accounting team can differentiate them by cost center.
- COST CENTER 2: Has no specific function.
b. DATEV accounts for payment methods
- Navigate to MY orderbird > Master Data > Payment Methods . Here, you can assign a specific DATEV account number to each payment method and evaluate your revenue separately by payment type.
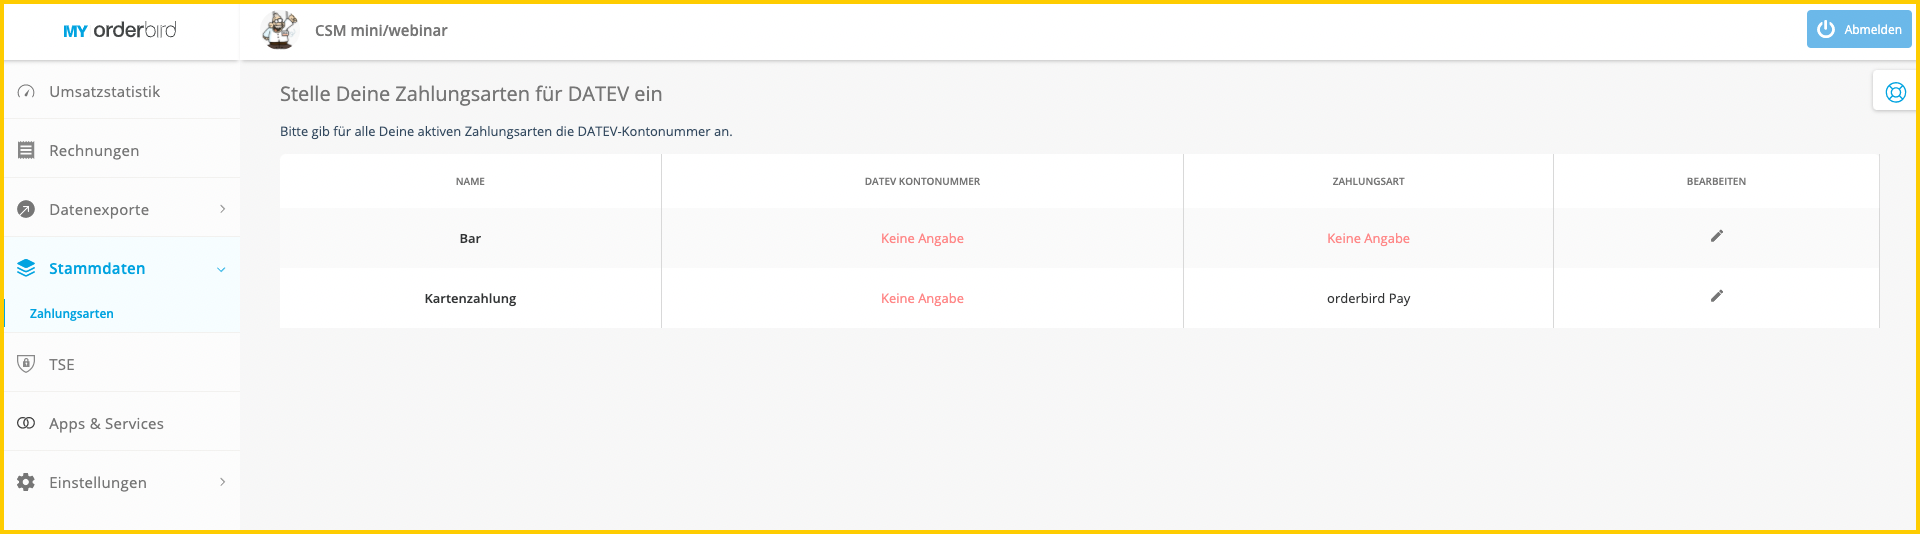
- Click the pencil icon on the far right next to the payment method for which you want to store a DATEV account.
- Enter the DATEV account number here.
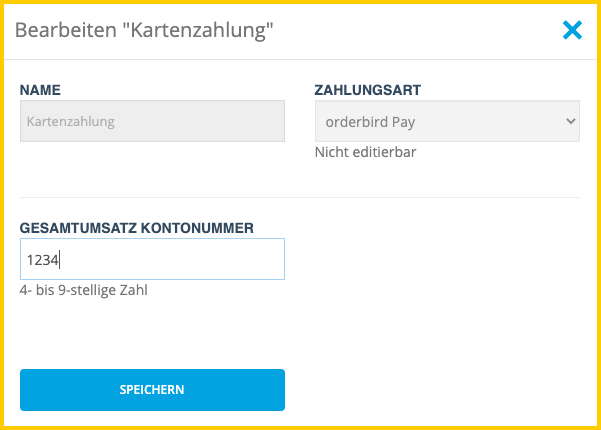
- Configure the DATEV account settings for each individual payment method. Your tax advisor can tell you which account numbers are correct for your business.